
Introducing Lake Country’s New MarineLine Buffing Pads
Experience Superior Marine Detailing with Our Specialized Range At Lake Country, we’re excited to unveil our all-new MarineLine—a comprehensive collection of buffing pads specifically engineered

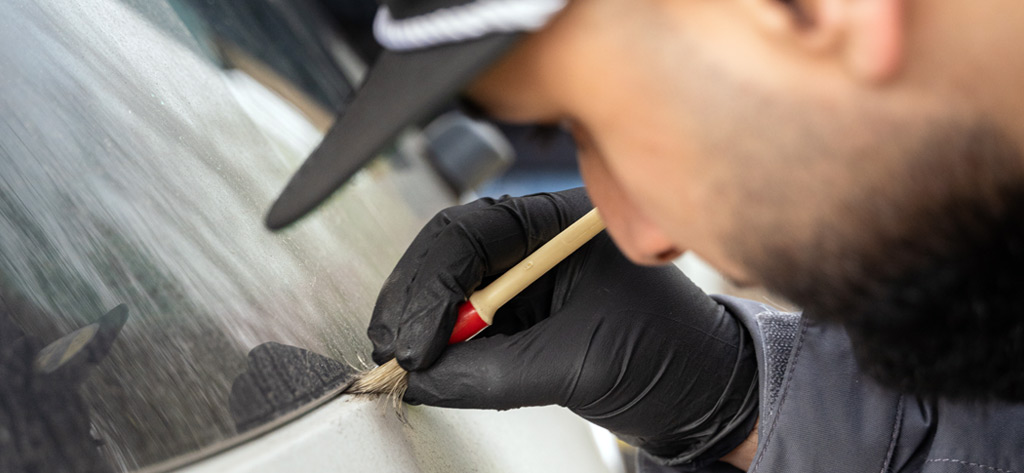
Cleaning a car to look and feel like new takes so much more than a wash mitt and shampoo. Sure, that’s part of the process, but when you look closely, you may find that there are traces and types of grime built up that subtly but totally ruin the ‘new car’ illusion. Water (containing various minerals) and dirt, mixing together and then drying out again, gradually build up a crust-like substance most noticeably in and around edges, panel shuts and gaps, hinges, badges, and at the bottom, sides and corners of windshields. When training pupils on how to clean a car, I explain that one of the most important parts of the job is actually concentrated on removing this built-up grime. The product I use to do that is a high-quality detailer’s water spot remover, sometimes applied with a cotton swab, sometimes with a folded microfiber towel, whatever makes sense for the task at hand. Water spot removers contain chemicals that dissolve this kind of dirt, so the only tricky thing is training yourself to look for and identify it in the first place.
Take a look at these two images and – once you see it, you can’t unsee it – you’ll notice the subtle but huge difference it makes to the presentation of the vehicle when you get rid of this built-up grime, which in this example has gathered along the seam weld inside the trunk hatch:
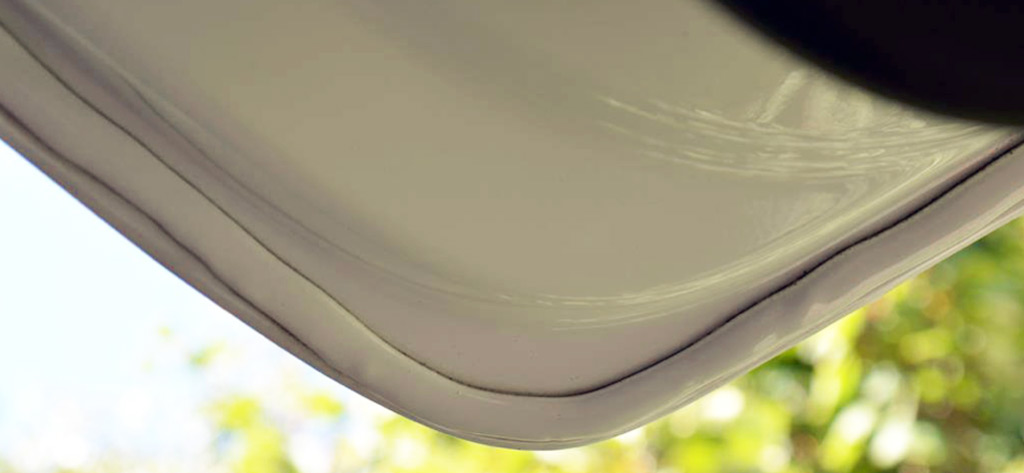
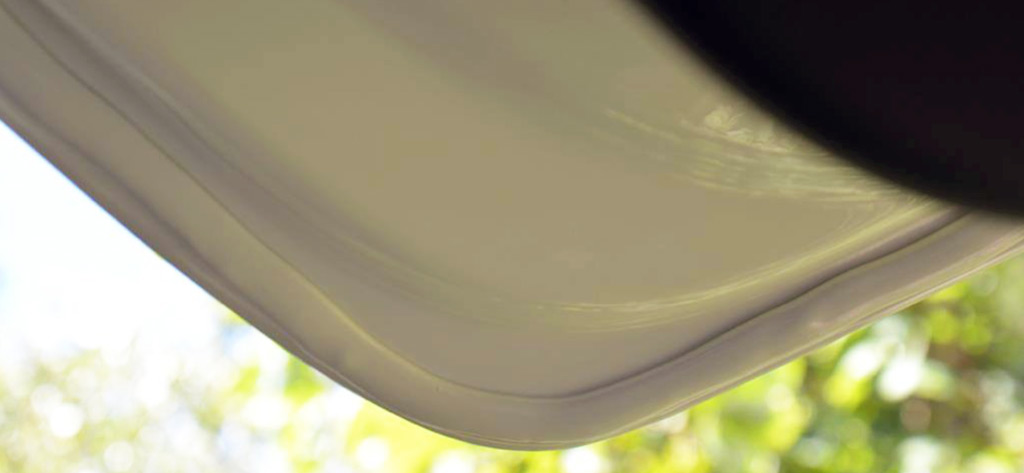
It goes without saying that deploying such careful attention to detail in your interior is also worthwhile, but in this blog, I’m going to concentrate on the parts of the car that are outside the cabin itself. Perhaps we’ll revisit interior tips another time – drop us a message or comment if you’re interested.

The world’s most skilled professional detailers, given perfect sterile working conditions and all the tools, equipment and time that they need, still have to push themselves to produce polishing results that they could regard as perfect. ‘Perfection’ is seldom achieved. Thanks to the law of diminishing returns, those last few per cent take the longest time (and therefore expense) to reach, raising the question of the value in doing so if the car is going to be used, and get dirty, and inevitably pick up minor swirls at some point in future. There must be a compromise and an agreement between the detailer and customer. So detailers generally offer machine polishing packages that align with client expectations, both raising and answering the question ‘how close to perfection is good enough?’
In practice, and fortunately, machine polishing your car to achieve ‘a dramatic improvement’ (rather than total perfection) is a relatively straightforward and accessible process even for the everyday novice or amateur. In fact, it’s downright easy. Working at a home garage or driveway, you really can get rid of swirls, staining and light scratches with nothing more than an inexpensive random orbital polisher, a polish, and a small selection of LC pads.
I would recommend a complete beginner look into acquiring an 8 or 9mm random orbital polisher, a medium cutting compound, a finishing polish, and a handful of Lake Country SDO Blue, Orange and Black pads. That’s really all you need (OK, you’ll need some clean microfiber cloths too) to take any car’s dull, stained, swirly, lightly scratched paintwork and transform it into a showroom example!
A typical way to get started is to work on a section of your roof or hood. To establish a baseline, take your Orange SDO pad and your medium cutting compound and visualize a square or rectangle approximately 9 to 12 times the size of the pad. Line your pad up centrally on the backing plate and prime it by spreading the compound lightly across the pad face. Keeping a comfortable and relaxed posture, put pad to paintwork with gentle pressure and (with the polisher speed set around halfway) work that section in overlapping motions – left to right, move down half a pad width; right to left, down half a pad width; left to right, back to the start and so on, for around 2 minutes. Try to work methodically – robotically, even – so that your section is polished equally. Carefully wipe away your polish residue with a clean microfiber towel, and inspect your results.
Congratulations! You have now experienced paint correction. Don’t forget—you can adapt your technique and use different pads/compounds to cut more aggressively (maybe with the Blue SDO pad), OR polish more gently for an even finer gloss (that’s what the Black SDO is for).
Be sure to follow our YouTube Channel, where we post lots of informative content that will help you get to grips with polishing a car like new in no time!
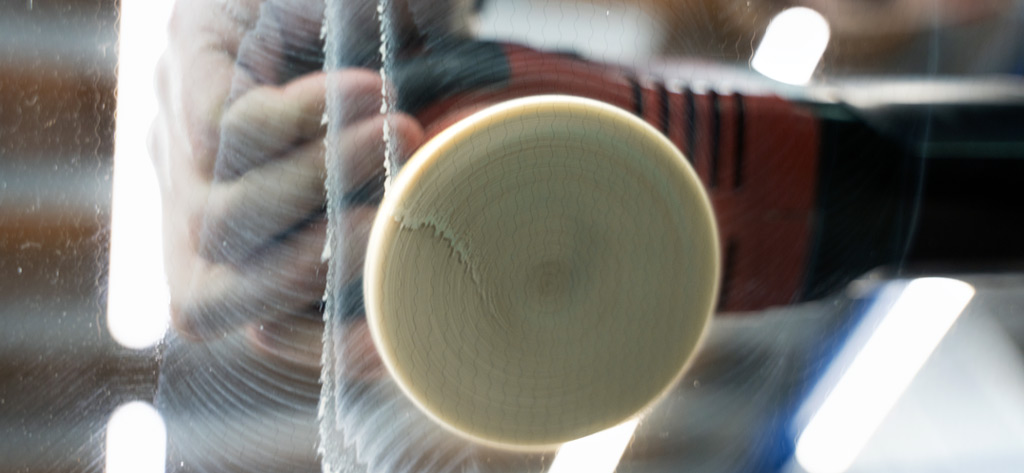
Here’s a great hack – you can machine polish your glass. Most people clean their glass when they wash their car, but have you noticed that when you take a damp cloth and wipe it across your ‘clean’ windshield, you can usually see streaky/stained patterns as it dries? This proves there’s some staining going on and your everyday glass cleaner isn’t going to shift it. One of the quickest ways to truly clean your glass is to machine polish it. In our shop, we frequently use some of our older microfibre cutting pads and a little compound on the windshield and other exterior windows just to strip all that staining away. Followed up with an alcohol-based cleaner (we just use Isopropyl Alcohol diluted 1:1 with distilled water)—this will leave a smear-free and super-clean surface ready for a glass coating. Quality hydrophobic glass coatings perform noticeably better when applied to glass that has been prepared in this way, and having rainwater beading off backward as you drive through bad weather not only looks cool, it reinforces that feeling of having a ‘special’ car!
I hope you find these tips helpful; mark my words, if you follow this advice, you’ll be hearing the most common thing that my clients say to me every week when they collect their detailed car from our shop:
“That looks brand new!”
And that’s exactly what you want a prospective buyer to say.
Until next time,
Jay @ LC UK

Experience Superior Marine Detailing with Our Specialized Range At Lake Country, we’re excited to unveil our all-new MarineLine—a comprehensive collection of buffing pads specifically engineered

Written for the IDA Detail Dialogue, Published December 2022 In detailing, we naturally obsess over tiny details – hence the name, I suppose. A smudge,

Polishing glass ranks as one of the most overlooked detailing skills and services. Aside from being aesthetically pleasing to have pure transparent glass, it’s incredibly

Experience Superior Marine Detailing with Our Specialized Range At Lake Country, we’re excited to unveil our all-new MarineLine—a comprehensive collection of buffing pads specifically engineered

Written for the IDA Detail Dialogue, Published December 2022 In detailing, we naturally obsess over tiny details – hence the name, I suppose. A smudge,